
Can Labeling Guide — How to Choose the Right Technology and Machine for Your Production Line
Why Can Labeling Matters More Than You Think
You have just shipped a container of canned cold-brew coffee to a distributor. Two weeks later, an email arrives: the labels are peeling at the edges. The batch gets pulled from shelves. The retailer demands a refund. The culprit? A label that could not handle condensation.
Can labeling is rarely the first thing a production manager thinks about when setting up a packaging line. Filling accuracy, seal integrity, throughput — those get the attention. But labeling sits at a unique intersection: it is the only part of your packaging that customers actually read. It carries your brand identity, your regulatory compliance, and your traceability codes. A label that bubbles, wrinkles, or fades does not just look bad — it triggers retail rejections, regulatory flags, and lost repeat purchases.
The numbers back this up. In high-speed lines, labeling accuracy is measured in fractions of a millimeter — ±0.5 mm for servo-driven systems, ±1 mm for standard setups. That half-millimeter determines whether your product looks professional next to competitors on a shelf. Packaging appearance issues alone account for an estimated 12–15% of consumer goods returns at retail. And on the production floor, every 1% of label defects drags overall equipment effectiveness down by 3–5%, because a labeling stoppage backs up the entire line.
Before you pick a machine or order a roll of labels, get the full picture. What technologies exist, which one fits your product, and how to make a choice that will not come back to haunt you six months later.
The Four Main Can Labeling Technologies Explained
Before diving into each method, here is a quick-reference comparison to orient you:
| Tecnologia | Melhor para | Speed Range | Label Durability | Custo relativo | Ideal Scenario |
|---|---|---|---|---|---|
| Pressure-Sensitive (PSL) | Multi-SKU, medium volume | 20–300 pcs/min | Good (material-dependent) | $$ | Dry/ambient storage, frequent label changes |
| Shrink Sleeve | Beverage, cold chain | 150–600+ cpm | Excelente | $$$ | Refrigerated display, 360° design, aluminum cans |
| Roll-Through (Cold Glue) | High-volume, single SKU | Up to 1,200 cpm | Good (paper) | $ | Mass production, cylindrical tin/aluminum cans |
| Direct Print | Ultra-high volume | 600–2,000 cpm | Permanent | $$$$ (setup) | Major brands, millions of units, long runs |
Now, each one in detail — not just how they work, but what manufacturers tend to leave out of the brochure.
Pressure-Sensitive Labeling (PSL)
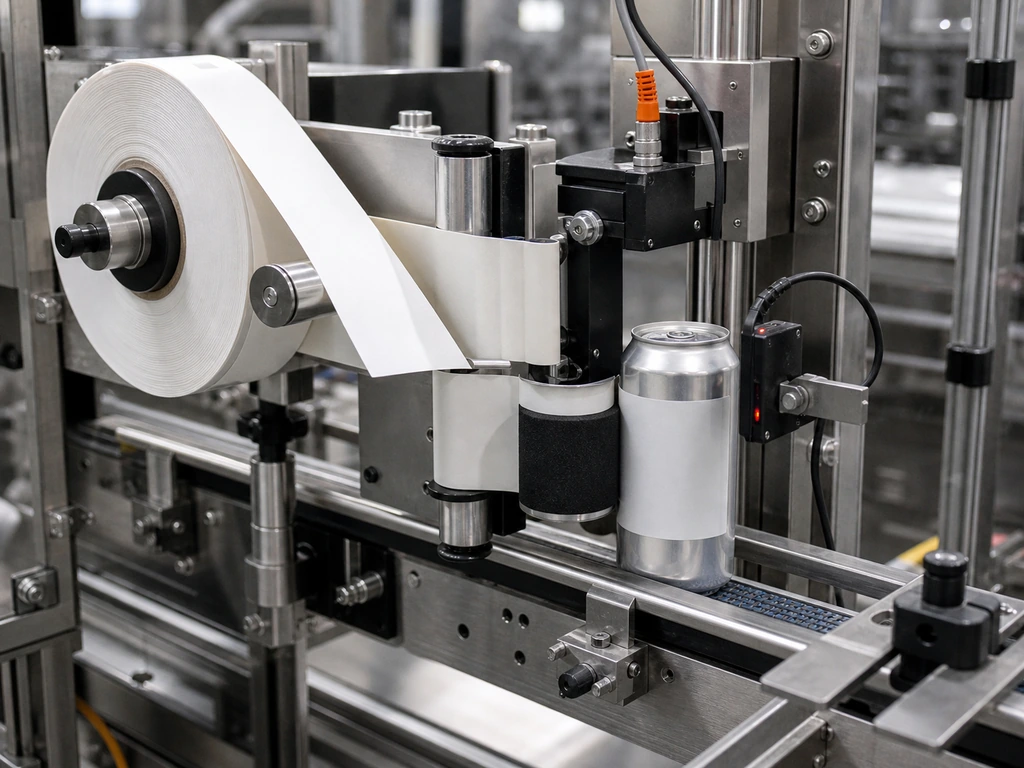
Pressure-sensitive labeling is the most widely used method, and for good reason. A pre-glued label on a release liner is pressed onto the can body or cap by a roller or tamp mechanism. Simple in concept — which is both its strength and its limitation.
Where PSL shines: The label material options are the broadest in the industry. You can run paper, BOPP (biaxially oriented polypropylene, 60–80 μm), or PET (50–75 μm) depending on your budget and durability needs. Changeover between label designs is fast — typically under 5 minutes on a well-designed semi-automatic machine. For operations running multiple SKUs in smaller batches, this flexibility is hard to beat.
Where PSL can trip you up: The can surface must be clean and dry. Any oil residue from filling or condensation from cold filling will compromise adhesion. Above 300 containers per minute, consistent label tension and placement requires precise servo control — cheaper stepper-motor machines drift over time. Paper labels without a laminate or UV varnish will not survive refrigeration or an ice bucket. If your product sits in a cold chain, PSL with a film label (BOPP or PET) and an acrylic-based adhesive is the minimum viable spec.
Best fit: Small-to-medium batches, multiple SKUs, products stored and sold at ambient temperature — protein powder cans, dry snack tins, spice containers.
Shrink Sleeve Labeling
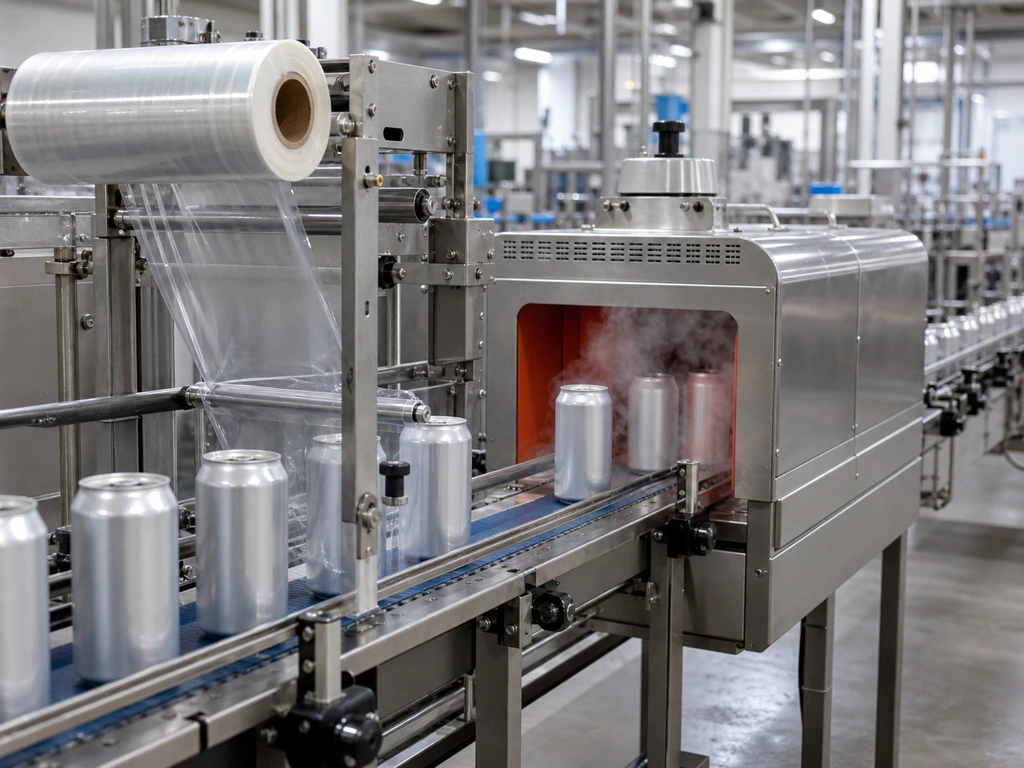
Shrink sleeve has become the dominant choice in beverages for one reason: it gives you 360 degrees of design real estate. Instead of a flat label glued to one side of the can, a printed plastic sleeve shrinks tightly around the entire container when passed through a heat tunnel (steam at 80–95°C or hot air at 180–220°C). The finished label feels like part of the can.
Where shrink sleeve dominates: PETG (polyethylene terephthalate glycol), the primary material, can shrink up to 78% — allowing the sleeve to conform to curved, tapered, or irregular container shapes that PSL cannot handle. The ink is printed on the inside of the film, protecting it from moisture, scratching, and UV exposure. For products that live in coolers, ice buckets, or humid environments, shrink sleeve is the most durable option available. This is why nearly every craft brewery using aluminum cans eventually moves to sleeving.
Where shrink sleeve demands more from you: The upfront investment is higher — not just the applicator, but the heat tunnel and the material itself. PETG film costs more per label than paper or BOPP. Changeover is slower: swapping film rolls and re-stabilizing tunnel temperatures takes 15–30 minutes. And here is a detail most first-timers miss: your artwork must be pre-distorted to account for the shrinkage. Print a design as-is and it warps when the film contracts. Experienced sleeving partners provide distortion templates, but it adds a prepress step.
Best fit: Beverages (craft beer, RTD cocktails, cold brew, functional drinks), refrigerated products, brands that want maximum shelf impact through 360° graphics.
Roll-Through Labeling (Cold Glue)
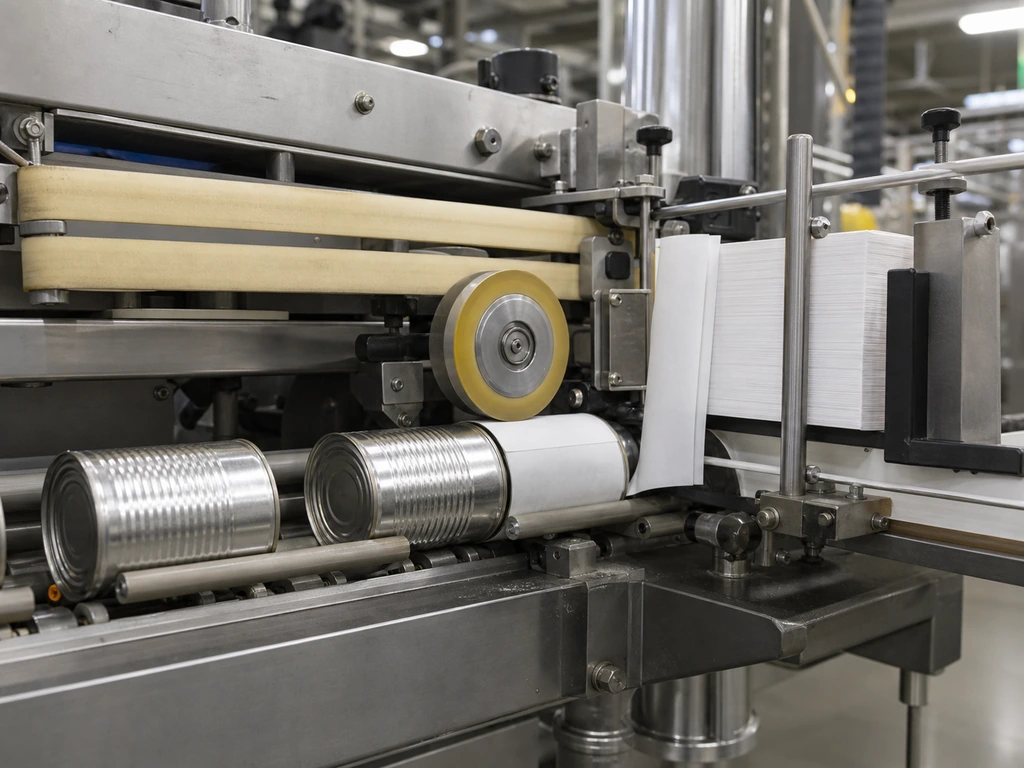
Roll-through labeling has been in use since the early 1900s, and the core mechanism has barely changed. A can rolls horizontally over a rotating glue wheel that applies a strip of adhesive, picks up a pre-cut paper label from a magazine, then rolls over a second glue station before the label ends are pressed together. The entire machine has two moving parts: the glue roll and the top belt.
Where roll-through is irreplaceable: Speed and reliability. A roll-through labeler can run at 1,200 containers per minute — faster than most filling lines can feed it. Two moving parts means almost nothing breaks. The labels are the cheapest option available: plain paper with cold glue (casein-based or starch-based). For a factory running a single product at high volume — canned vegetables, soups, pet food — roll-through delivers the lowest total cost per labeled can.
Where roll-through falls short: It only works on perfectly cylindrical containers. The label wraps the can body but does not cover the full surface — you get a front and back seam, not a 360° wrap. Glue management needs operator attention: open time between glue application and label pickup is just 2–5 seconds, and glue pots require regular cleaning. Multi-SKU production with frequent changeovers is not practical — each change means swapping label magazines, cleaning glue systems, and recalibrating.
Best fit: High-volume, single-SKU production of cylindrical tinplate or aluminum cans — canned food, pet food, commodity products where label cost per unit drives the decision.
Matching Label Type to Your Product, Container, and Environment
Knowing what each technology does is only half the battle. The real question: which one matches your specific situation? This matrix cross-references the four methods against the factors that matter on your production floor.
| Fator | PSL | Shrink Sleeve | Roll-Through | Direct Print |
|---|---|---|---|---|
| Container material | Tin, aluminum, plastic, glass, paper | Best on aluminum, also tin/plastic/glass | Cylindrical tin/aluminum only | Aluminum (pre-coated) |
| Ambiente de armazenamento | Dry, ambient | Cold, wet, condensing | Dry, ambient | All (ink is permanent) |
| Multi-SKU flexibility | Excelente | Moderado | Pobres | Very poor |
| Label cost per unit | $0.03–0.08 | $0.05–0.15 | $0.01–0.03 | N/A (CAPEX-driven) |
| Minimum practical volume | 500–1,000 units/run | 5,000+ units/run | 50,000+ units/run | 500,000+ units/run |
From Manual to Fully Automatic — Choosing Your Automation Level
Automation is not a binary choice between “hand labeling” and “million-dollar robot.” It is a spectrum, and the right point on that spectrum depends on your current volume and your trajectory.
Manual labeling (0–200 units/day): One person applying pre-cut stickers by hand at 3–5 cans per minute. Viable for test batches, farmers’ market runs, or a product still in proof-of-concept. Not a production strategy.
Semi-automatic (200–2,000 units/day): The operator places the can into a fixture or onto a roller; the machine applies the label at 20–40 pieces per minute. This is the workhorse tier for small-to-medium producers. The math is straightforward: if you spend 3 hours a day hand-labeling, that labor cost alone adds up to roughly the price of an entry-level semi-automatic PSL machine within 6–12 months. The machine pays for itself in labor savings before you factor in the consistency improvement.
Fully automatic (2,000+ units/day): Cans feed in on a conveyor, the labeler applies labels in-line, and finished cans exit without human touch. Speed: 60–300 pieces per minute for PSL, up to 1,200 cpm for roll-through. The investment is larger, but so is the throughput. The key decision point: if your filling line already runs at 80 cans per minute, a semi-automatic labeler that maxes out at 40 creates a bottleneck. Your labeler speed should be at least 1.1–1.2× your filler speed.
Do not buy more automation than your upstream and downstream equipment can match. A 300-cpm labeler paired with a 50-cpm filler is a Formula 1 engine in a sedan — impressive on paper, wasteful in practice. Match the line, not the brochure.
Key Factors in Selecting a Can Labeling Machine
Once you have settled on a technology and automation level, the machine itself comes down to six practical factors. These separate a machine you love from one you regret.
When evaluating suppliers, look for manufacturers that offer both custom can labeling machine configuration — so the machine structure, speed, electrical component brands, and dimensions are tailored to your actual production environment rather than a one-size-fits-all catalog spec — and transparent after-sales support programs that spell out warranty coverage, spare parts kit contents, and response time commitments in writing. Levapack, for example, provides engineering consultation with CAD drawing support during the pre-sales phase, ships spare parts kits with critical wear components included, and backs every machine with 24/7 technical support accessible through video call and online channels. These two dimensions — configurability upfront and support afterward — are where the difference between a machine that fits and a machine you tolerate gets made.
Beyond the Labeler — Integrating Labeling Into Your Complete Packaging Line
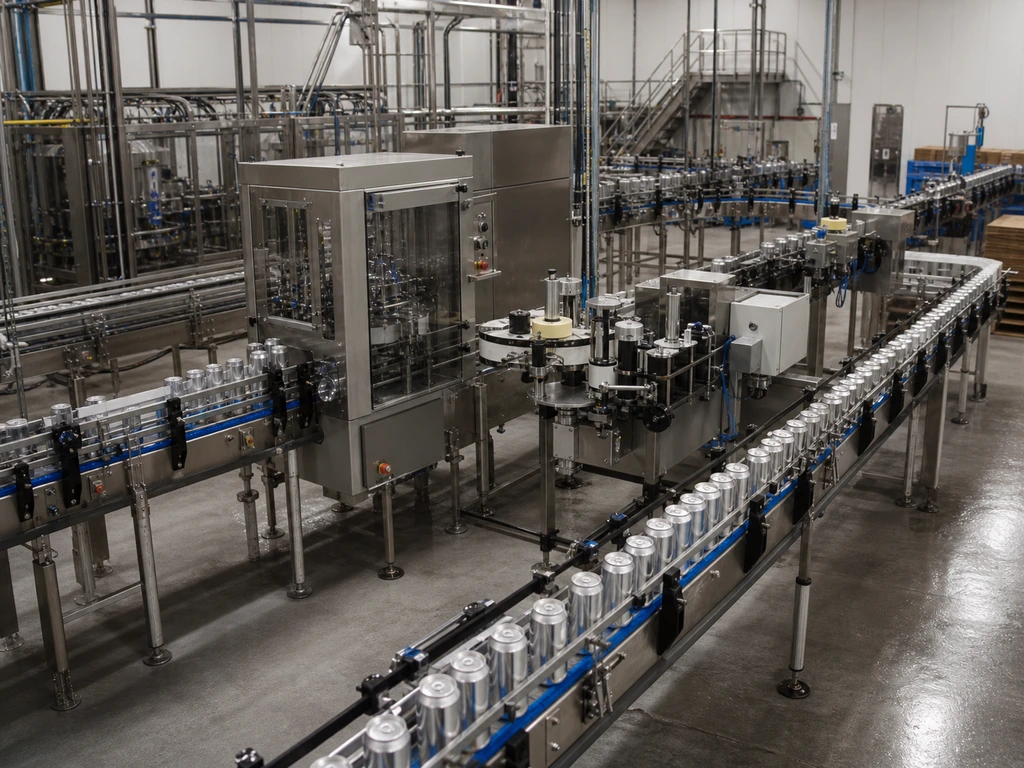
Most labeling guides skip this part. But the best labeler in the world cannot save a badly designed line.
In a real production environment, labeling is one link in a chain: rinse → fill → seal → label → code → pack. If your filler runs at 60 cpm and your labeler at 120, the labeler spends half its time waiting. If the conveyor between seamer and labeler is too short, cans arrive wobbling — and placement accuracy suffers regardless of how precise the machine is.
There is also a strategic question: buy machines separately from different suppliers, or source the entire line from one partner? Multi-vendor lines give you maximum flexibility to pick best-in-class for each station, but you inherit the integration burden — coordinating delivery timelines, control compatibility, and service accountability across multiple companies. A single-supplier line costs more in negotiation leverage but removes the finger-pointing when something goes wrong. For a first-time line buyer, the simplicity of one throat to choke is usually worth the premium.
Regulatory Essentials Every Can Label Must Meet
A beautiful label that fails regulatory requirements does not ship. For food and beverage products sold in the United States, two agencies set the rules.
FDA requirements (21 CFR 101) — all food and beverage cans:
- Declaração de identidade: The common name of the product, placed prominently on the Principal Display Panel (PDP) — the side the consumer sees on the shelf. Must be in bold type and among the most visible elements on the label.
- Net Contents: The product quantity, in both US customary and metric units (e.g., “Net Wt. 12 oz (340 g)”), on the lower 30% of the PDP.
- Painel de Informação Nutricional: Standardized format with serving size, calories, and nutrient breakdown. The “Nutrition Facts” heading must be ≥13 pt type; body text ≥8 pt.
- Lista de ingredientes: All ingredients in descending order by weight. Sub-ingredients must be parenthetically listed (e.g., “Chocolate (sugar, cocoa butter, cocoa mass)”).
- Declaração de alergénios: The top 9 major food allergens (milk, eggs, fish, shellfish, tree nuts, peanuts, wheat, soybeans, sesame) declared by their common names, either in the ingredient list or in a separate “Contains” statement.
- Manufacturer/Distributor Information: Name and address of the responsible party. Street address required if not listed in a current city directory.
TTB requirements — alcoholic beverages (additional):
If your can contains beer, wine, or spirits, TTB regulations (27 CFR Parts 4, 5, and 7) add: alcohol content (% ABV), the government warning statement, disclosure of sulfites and color additives (e.g., FD&C Yellow No. 5), and — critically — a Certificate of Label Approval (COLA) obtained antes de the product enters commerce. Skipping COLA is one of the most expensive mistakes a new beverage brand can make.
The durability-compliance link: Every required piece of information must remain legible for the product’s entire shelf life. If a paper label fades after six months in a warehouse, or a PSL label peels in a cooler, you have a compliance problem — not just a cosmetic one. Label material and application method are not purely aesthetic choices. They are part of your regulatory risk management.
If you are evaluating labeling solutions and want to compare specifications or discuss a configuration that fits your can size and production volume, Levapack’s catalog and engineering team are available for consultation.


 EN
EN  RU
RU  ES
ES  FR
FR  DE
DE  NL
NL  IT
IT  JA
JA  ID
ID  PT
PT  KO
KO