
ฉลากที่ไวต่อแรงกดคืออะไร? คู่มือสำหรับผู้จัดการฝ่ายผลิตเกี่ยวกับวัสดุ เครื่องจักร และการติดฉลากบนกระป๋อง
หากคุณเคยใช้เวลาอยู่ใกล้สายการผลิตบรรจุภัณฑ์ คุณคงเคยเห็นฉลากที่ไวต่อแรงกดมาแล้ว ไม่ว่าจะเป็นฉลากมันวาวที่หุ้มกระป๋องเบียร์คราฟต์ ฟิล์มใสที่หุ้มขวดอาหารเสริม หรือฉลากกระดาษที่มีพื้นผิวสัมผัสบนกระป๋องกาแฟระดับพรีเมียม — ทั้งหมดนี้ล้วนอยู่ในกลุ่มเทคโนโลยีเดียวกัน แต่สิ่งที่ทำให้ฉลากเป็น “ไวต่อแรงกด” คืออะไร และทำไมสิ่งนี้จึงสำคัญต่อสายการผลิตของคุณ?
นี่คือคำตอบสั้นๆ: ฉลากที่ไวต่อแรงกด (PSL) คือฉลากแบบติดเองที่ติดกับพื้นผิวเมื่อมีแรงกด — ไม่ต้องการความร้อน ไม่ต้องการน้ำ และไม่ต้องการกาวแยกต่างหาก ฉลากนี้มาพร้อมใช้งานทันที เนื่องจากกาวได้ถูกฝังอยู่ในตัวฉลากแล้ว.
แต่คำตอบสั้นๆ นั้นช่วยได้เพียงเท่านี้เท่านั้น หากคุณกำลังประเมินเทคโนโลยีการติดฉลากสำหรับกระบวนการบรรจุกระป๋องหรือบรรจุภัณฑ์ คุณจำเป็นต้องเข้าใจว่าฉลากเหล่านี้ทำจากวัสดุอะไร มีพฤติกรรมอย่างไรบนพื้นผิวต่าง ๆ เครื่องจักรใดใช้ในการติดฉลาก และ — ที่สำคัญที่สุด — ประสิทธิภาพของฉลากเหล่านี้เมื่อใช้กับภาชนะโลหะทรงกระบอกโดยเฉพาะ คู่มือนี้จะครอบคลุมทุกประเด็นดังกล่าว.
ฉลากที่ไวต่อแรงกดคืออะไร? โครงสร้างสามชั้น

ฉลากที่ไวต่อแรงกดไม่ใช่เพียงวัสดุเดียว แต่เป็นวัสดุแบบลามิเนต — ซึ่งในอุตสาหกรรมนี้บางครั้งเรียกว่า “ฉลากแบบแซนด์วิช” — ที่ประกอบด้วยสามชั้นที่แตกต่างกัน โดยแต่ละชั้นมีหน้าที่เฉพาะตัว หากนำชั้นใดชั้นหนึ่งออก ฉลากก็จะไม่สามารถทำงานได้.
สามชั้นดังกล่าวคือ: วัสดุหน้า (สิ่งที่คุณเห็น), กาว (สิ่งที่ทำให้มันติดอยู่), และ ชั้นรอง (กระดาษรองที่ช่วยปกป้องสารติดจนกว่าจะนำไปใช้) ต่อไปนี้คือวิธีการทำงานของแต่ละชนิด.
ส่วนหน้าของผลิตภัณฑ์: สิ่งที่ลูกค้าเห็นและสัมผัส
ส่วนหน้า (facestock) คือพื้นผิวที่สามารถพิมพ์ได้ — ชั้นบนสุดที่แสดงภาพลักษณ์แบรนด์ รายการส่วนผสม รหัสบาร์โค้ด และข้อมูลตามข้อกำหนดทางกฎหมาย เป็นส่วนเดียวของฉลากที่ผู้บริโภคปลายทางได้สัมผัสโดยตรง.
วัสดุหน้าฉลากแบ่งออกเป็นสามประเภทหลัก ได้แก่ กระดาษ ฟิล์ม และฟอยล์ วัสดุหน้าฉลากทำจากกระดาษมีราคาประหยัดและพิมพ์ได้สวยงาม จึงได้รับความนิยมสำหรับผลิตภัณฑ์ที่เก็บในสภาพแห้งและอุณหภูมิห้อง เช่น ขวดเครื่องเทศและกล่องเก็บขนมขบเคี้ยว วัสดุหน้าฉลากประเภทฟิล์ม — โดยทั่วไปคือ BOPP (โพลีโพรพิลีนที่ผ่านกระบวนการยืดสองทิศทาง) ซึ่งครองส่วนแบ่งตลาดฉลากฟิล์มมากกว่า 60% — มีความสามารถในการต้านความชื้นและความทนทานที่กระดาษไม่สามารถเทียบได้ ส่วนวัสดุหน้าฉลากประเภทฟอยล์และโลหะให้ภาพลักษณ์ที่โดดเด่นบนชั้นวางสินค้า ซึ่งเป็นเหตุผลที่มักเห็นใช้บนขวดไวน์และเครื่องสำอางระดับพรีเมียม.
การเลือกวัสดุหน้าฉลากที่เหมาะสมหมายถึงการตอบคำถามหนึ่งข้อ: ฉลากนี้จะถูกใช้งานในสภาพแวดล้อมใด? ฉลากกระดาษที่ติดบนผลิตภัณฑ์ที่เก็บในตู้เย็นจะดูดความชื้นและเสียหาย ส่วนฉลากฟิล์มที่ติดบนสินค้าแห้งในตู้เก็บอาหารอาจเป็นการเลือกวัสดุที่เกินความจำเป็นและทำให้ค่าใช้จ่ายสูงขึ้น สภาพแวดล้อมคือปัจจัยที่กำหนดการเลือกวัสดุ.
ฉลากหลายชนิดยังมีชั้นเคลือบหรือชั้นลามิเนต — ซึ่งเป็นชั้นป้องกันบาง ๆ ที่เคลือบบนวัสดุพิมพ์ด้านหน้า ชั้นเคลือบนี้ช่วยเพิ่มความทนต่อรอยขีดข่วน ความคงตัวต่อรังสี UV และความทนต่อสารเคมี สำหรับผลิตภัณฑ์ที่ต้องเผชิญกับน้ำค้าง การเสียดสีระหว่างการขนส่ง หรือการวางแสดงกลางแจ้ง การไม่ใช้ชั้นเคลือบถือเป็นการประหยัดที่ผิดวิธี.
แหล่งอ้างอิงมาตรฐาน: มาตรฐาน ASTM D5375 กำหนดวิธีการทดสอบสำหรับการเลือกวัสดุทำฉลากที่ติดด้วยแรงกด รวมถึงคุณสมบัติการถอดชั้นรองและคุณสมบัติการเรียบแบน (ASTM International).
สารยึดติด: ผู้ทำงานหนักที่ซ่อนตัวอยู่เบื้องหลัง
หากวัสดุหน้าเป็นใบหน้า สารยึดติดก็คือกล้ามเนื้อ และนี่คือสาเหตุหลักที่ทำให้ฉลากล้มเหลวในการใช้งานจริง.
สารยึดติดที่ไวต่อแรงกดมีคุณสมบัติเป็นวิสโคอีลาสติก — มันจะทำงานเหมือนของเหลวเมื่อถูกกดลง โดยไหลเข้าไปในร่องเล็กๆ บนพื้นผิวของภาชนะเพื่อสร้างการยึดติดทางกล แล้วจะล็อคตัวอยู่ในตำแหน่งเหมือนของแข็งเมื่อแรงกดถูกยกออก ลองนึกถึงการต่อก้อนเลโก้สองก้อนเข้าด้วยกัน: มันจะยืดหยุ่นพอที่จะต่อกันได้ง่าย แต่การแยกมันออกจากกันต้องใช้แรงมาก.
โลกของสารยึดติดสามารถแบ่งออกเป็นสี่ประเภทหลักได้ดังนี้:
- กาวอะคริลิกแบบถาวร เป็นวัสดุหลักของอุตสาหกรรมนี้ พวกมันมีความทนทานต่อรังสี UV และการออกซิเดชันที่ดี ทนต่อช่วงอุณหภูมิที่กว้าง และมีราคาที่สมเหตุสมผล การใช้งานส่วนใหญ่ในสภาพแห้งและอุณหภูมิห้องมักใช้อะคริลิกแบบถาวร.
- กาวที่มีส่วนผสมของยาง ให้แรงยึดติดเริ่มต้นที่สูงขึ้น — ติดได้เร็วและแน่นกว่าบนพื้นผิวที่ยากต่อการยึดติด หากคุณกำลังติดฉลากบนพลาสติกที่มีพลังงานพื้นผิวต่ำ เช่น โพลีเอทิลีนหรือโพลีโพรพิลีน คุณจำเป็นต้องใช้ระบบที่มีส่วนผสมของยาง ข้อเสียคือความทนทานต่อสภาพอากาศจะลดลงเมื่อเวลาผ่านไป.
- กาวสำหรับตู้แช่แข็ง ได้รับการพัฒนาให้มีอุณหภูมิการเปลี่ยนสถานะของแก้ว (Tg) ที่ต่ำลง ทำให้ยังคงความยืดหยุ่นและมีความเหนียวติดที่อุณหภูมิ -20°C หรือต่ำกว่า ส่วนอะคริลิกแบบมาตรฐานจะกลายเป็นเปราะในสภาพดังกล่าว.
- กาวที่สามารถถอดออกและติดใหม่ได้ ช่วยให้ลอกออกได้อย่างสะอาด เช่น คูปองส่งเสริมการขายหรือป้ายราคาชั่วคราว — ความยึดติดจะคงอยู่ระหว่างการจัดแสดงในร้านค้า แต่จะลอกออกได้อย่างสะอาดเมื่อผู้บริโภคลอกออก.
การตัดสินใจเลือกกาวทุกครั้งต้องเริ่มจากพื้นผิวที่คุณจะติดฉลาก แก้วและโลหะเป็นวัสดุที่มีพลังงานพื้นผิวสูง (มากกว่า 500 ไดน์/ซม.) — จึงติดได้ง่าย ส่วนโพลีเอทิลีนและโพลีโพรพิลีนที่ยังไม่ผ่านกระบวนการปรับสภาพมีค่าพลังงานพื้นผิวประมาณ 30–38 ไดน์/ซม. — เป็นวัสดุที่เฉื่อยทางเคมี และขึ้นชื่อว่าเป็นวัสดุที่ติดยากมากหากไม่ใช้กาวที่มีความเหนียวสูง การทดสอบไดน์อย่างรวดเร็วบนภาชนะจริงของคุณ (ไม่ใช่ตัวอย่างแทน) จะช่วยให้คุณทราบว่าคุณกำลังทำงานกับวัสดุประเภทใด.
การควบแน่นคือศัตรูเงียบของกาว ฉลากที่ติดแน่นสมบูรณ์แบบบนกระป๋องแห้งในอุณหภูมิห้อง อาจสูญเสียความเหนียวเริ่มต้นไป 40–60% เมื่อติดลงบนพื้นผิวที่เย็นและเปียกทันทีหลังจากออกจากสายการบรรจุ หากสภาพแวดล้อมการผลิตของคุณมีกระบวนการบรรจุในสภาพเย็นหรือการควบแน่นหลังการพาสเจอไรซ์ การใช้สูตรกาวแบบติดในสภาพเปียกจึงเป็นสิ่งที่ขาดไม่ได้.
ชั้นรองการปล่อย: ทำไมกระดาษรองจึงสำคัญ
ชั้นรองหลังเป็นฮีโร่ที่ไม่ได้รับการยกย่องในม้วนฉลาก ผู้บริโภคไม่เคยเห็นมันเลย แต่ผู้ควบคุมเครื่องติดฉลากของคุณกลับคิดถึงมันทุกครั้งทุกกะ.
ชั้นรอง (liner) คือกระดาษหรือฟิล์มที่ใช้เป็นชั้นรองรับ ซึ่งนำฉลากผ่านกระบวนการพิมพ์ การตัดด้วยแม่พิมพ์ และสุดท้ายส่งไปยังสายการผลิตของคุณ พื้นผิวของชั้นรองนี้ถูกเคลือบด้วยสารปล่อยซิลิโคน ซึ่งช่วยป้องกันไม่ให้กาวติดกับชั้นรองอย่างถาวร — มีความแข็งแรงพอที่จะยึดฉลากไว้ได้ระหว่างการเก็บรักษาและการขนส่ง แต่มีความอ่อนพอที่จะหลุดออกได้อย่างสะอาดเมื่อผ่านแผ่นลอก.
การเลือกตัวอักษรแบ่งออกเป็นสองทาง. กระดาษรอง (กระดาษกึ่งฟอกสีหรือกระดาษคราฟต์) มีต้นทุนที่คุ้มค่าและทำงานได้ดีที่ความเร็วสายพานต่ำกว่า 100 กล่องต่อนาที แต่กระดาษเหล่านี้จะก่อให้เกิดฝุ่นเมื่อโค้งผ่านลูกกลิ้งนำทาง และฝุ่นดังกล่าวเป็นสาเหตุหลักที่ทำให้เซ็นเซอร์ตรวจจับฉลากแบบโฟโตอิเล็กทริกทำงานผิดพลาด. ชั้นรองทำจากฟิล์ม PET มีราคาสูงกว่า 30–50% แต่สร้างฝุ่นได้น้อยจนแทบเป็นศูนย์ มีความแข็งแรงในการดึงสูงกว่า และมีความเสถียรทางมิติที่ดีกว่าเมื่อทำงานด้วยความเร็วเกิน 200 cpm สำหรับสายการผลิตกระป๋องที่มีกำลังการผลิตสูง ค่าใช้จ่ายเพิ่มเติมสำหรับฟิล์มไลเนอร์จะคืนทุนได้จากการลดเวลาหยุดทำงาน.
แรงปล่อย — ที่วัดเป็นกรัมต่อนิ้วของการลอก — ถูกปรับให้เหมาะสมกับแต่ละการใช้งาน หากแรงปล่อยน้อยเกินไป ฉลากจะหลุดออกก่อนเวลาภายในเครื่อง แต่หากแรงปล่อยมากเกินไป ชั้นรองฉลากจะยืดหรือขาด ชั้นรองฉลากที่ได้รับการกำหนดคุณสมบัติอย่างเหมาะสมอาจดูเหมือนเป็นเพียงรายละเอียดเล็กน้อย แต่ในวันผลิตที่ยุ่งวุ่นวาย นี่คือความแตกต่างระหว่างการทำงานที่ราบรื่นกับกองฉลากที่หลุดออก.
วัสดุและสารยึดติดของฉลาก: องค์ประกอบพื้นฐานที่กำหนดประสิทธิภาพของ PSL

คุณคงรู้จักโครงสร้างสามชั้นแล้วใช่ไหมครับ ตอนนี้ก็ถึงเวลาที่ต้องพิจารณาคำถามในทางปฏิบัติแล้ว: วัสดุใดควรใช้ในส่วนไหน? มีสี่ปัจจัยที่กำหนดคำตอบ ได้แก่ สภาพแวดล้อมของผลิตภัณฑ์ วัสดุของบรรจุภัณฑ์ งบประมาณ และเป้าหมายด้านการสร้างภาพลักษณ์แบรนด์ หากเปลี่ยนแปลงปัจจัยหนึ่ง คุณอาจต้องพิจารณาปัจจัยอีกสามปัจจัยใหม่อีกครั้ง.
กระดาษแบบหน้าเดียว: ประหยัดค่าใช้จ่ายและเหมาะสำหรับการพิมพ์
กระดาษเป็นตัวเลือกแบบดั้งเดิมและยังคงเป็นตัวเลือกที่มีราคาถูกที่สุด โดยทั่วไปมีราคาอยู่ที่ 50–70% ของราคาวัสดุหน้าฟิล์มที่มีคุณสมบัติเทียบเท่า กระดาษแบบกึ่งเงาหรือเงาสูง (มักเรียกว่า C1S หรือ coated-one-side) เป็นประเภทที่ใช้กันอย่างแพร่หลายที่สุด — สามารถรับหมึกพิมพ์แบบฟเล็กโซกราฟิกและหมึกพิมพ์ดิจิทัลได้อย่างชัดเจน รองรับการเคลือบวานิชและการปั๊มฟอยล์ และดูเงางามเมื่อวางบนชั้นวางสินค้า.
กระดาษเหมาะที่สุดสำหรับสินค้าแห้งที่เก็บไว้ในอุณหภูมิห้อง เช่น กระป๋องกาแฟ กระป๋องเครื่องเทศ กล่องเก็บขนมขบเคี้ยวแห้ง และขวดผงโปรตีน นอกจากนี้ยังเป็นตัวเลือกที่เป็นมิตรต่อสิ่งแวดล้อมที่สุด — สามารถนำไปรีไซเคิลได้ในระบบรีไซเคิลกระดาษมาตรฐาน และมีให้เลือกใช้มากขึ้นเรื่อยๆ ด้วยเส้นใยที่ได้รับการรับรองจาก FSC.
ข้อจำกัดนี้ชัดเจน: กระดาษและความชื้นไม่เข้ากัน ในสภาพแวดล้อมที่มีความชื้นสัมพัทธ์เกิน 85% ป้ายกระดาษจะเริ่มดูดซับน้ำ สูญเสียความคงตัวทางมิติ และในที่สุดจะหลุดลอกออก สำหรับอาหารที่เก็บในตู้เย็น ผลิตภัณฑ์แช่แข็ง หรือภาชนะใด ๆ ที่เกิดการควบแน่น กระดาษไม่ใช่ตัวเลือกที่เหมาะสม เช่นเดียวกัน กระดาษฉีกขาดได้ง่ายกว่าฟิล์ม — หากป้ายต้องทนต่อกระบวนการจัดส่งที่สมบุกสมบัน ควรเปลี่ยนมาใช้ฟิล์มแทน.
กระดาษชนิดพิเศษ — กระดาษที่มีผิวเป็นประกายมุก กระดาษที่มีพื้นผิวแบบผ้าสักหลาด กระดาษผสมผ้าฝ้าย — สามารถเพิ่มมูลค่าที่ผู้บริโภครับรู้ของผลิตภัณฑ์ได้ ฉลากกระดาษที่มีพื้นผิวบนกระป๋องชาใบหลวมระดับพรีเมียม ช่วยสื่อถึงฝีมือการผลิตอย่างประณีต ซึ่งฉลากฟิล์มมันเงาไม่สามารถทำได้ วัสดุนั้นเองจึงกลายเป็นส่วนหนึ่งของเรื่องราวแบรนด์.
วัสดุฟิล์มสำหรับหน้าผลิตภัณฑ์: ความทนทานสำหรับสภาพแวดล้อมที่ท้าทาย
ฟิล์มสำหรับฉลากเป็นกลุ่มผลิตภัณฑ์ที่ตลาดฉลากแบบติดด้วยแรงกดกำลังเติบโตเร็วที่สุด และ BOPP — โพลีโพรพิลีนที่ผ่านกระบวนการยืดตัวสองทิศทาง — เป็นรูปแบบที่ครองตลาดหลัก โดยคิดเป็นมากกว่าครึ่งหนึ่งของการใช้ฟิล์มสำหรับฉลากทั้งหมด.
BOPP มีสามประเภทตามลักษณะทางสายตา ได้แก่ สีขาว (ไม่โปร่งแสง มีพื้นผิวพิมพ์ที่มีความคมชัดสูง), แบบใส (สำหรับ “สไตล์ไม่มีฉลาก” ที่สามารถมองเห็นผลิตภัณฑ์ได้ผ่านฉลาก) และแบบเมทัลไลซ์ (มีชั้นอลูมิเนียมบางที่เคลือบด้วยวิธีระเหยในสุญญากาศ เพื่อสร้างพื้นผิวโลหะ ด้วยต้นทุนเพียงส่วนน้อยของฟอยล์โลหะแบบทึบ) เมื่อ BOPP แบบใสถูกใช้ร่วมกับกาวที่ใสทางแสง จะสร้างภาพลวงตาว่าภาพกราฟิกถูกพิมพ์โดยตรงบนบรรจุภัณฑ์ — ซึ่งเป็นเทคนิคที่แบรนด์เครื่องดื่มและผลิตภัณฑ์ดูแลส่วนบุคคลนิยมใช้ เนื่องจากให้รูปลักษณ์ที่สะอาดและทันสมัย.
นอกจาก BOPP แล้ว ยังมีฟิล์มอีกสองประเภทที่ตอบสนองความต้องการเฉพาะทาง. โพลีเอทิลีน (PE) มีความนุ่มและยืดหยุ่นได้ดีกว่า — เป็นวัสดุหน้าเดียวที่สามารถใช้งานได้อย่างน่าเชื่อถือกับหลอดที่บีบได้และถุงยืดหยุ่น เนื่องจากมันยืดตามรูปทรงของภาชนะแทนที่จะเกิดการบิดเบี้ยว. โพลีเอสเตอร์ (PET) เป็นวัสดุที่มีความทนทานสูงสุด โดยสามารถรักษาความสมบูรณ์ของฉลากได้ในช่วงอุณหภูมิตั้งแต่ -40°C ถึง 150°C ภาชนะบรรจุสารเคมีอุตสาหกรรม สารหล่อลื่นสำหรับรถยนต์ และผลิตภัณฑ์ที่ออกแบบมาเพื่อใช้งานในสภาพแวดล้อมการขนส่งที่รุนแรง มักใช้ PET เป็นวัสดุหลัก.
ลำดับชั้นของต้นทุนนั้นชัดเจน: กระดาษ < BOPP < BOPP เคลือบโลหะ < ฟอยล์แข็ง < ฟิล์มพิเศษ ส่วนใหญ่แล้วงบประมาณการผลิตจะอยู่ในช่วงระหว่างกระดาษถึง BOPP โดยฟอยล์ถูกใช้สำหรับ SKU ระดับพรีเมียม และ PET ถูกใช้สำหรับการใช้งานในสภาพแวดล้อมที่รุนแรง.
ฟอยล์และวัสดุหน้าพิเศษ: สร้างความประทับใจบนชั้นวางสินค้าอย่างพรีเมียม
หากผลิตภัณฑ์ของคุณต้องแข่งขันในหมวดหมู่สินค้าปลีกที่มีการแข่งขันสูง ซึ่งผู้บริโภคต้องตัดสินใจเลือกสินค้าบนชั้นวางภายในเสี้ยววินาที วัสดุฟอยล์และวัสดุหน้าพิเศษจะแสดงศักยภาพได้อย่างเต็มที่ ความเงาแบบโลหะจะดึงดูดสายตาได้อย่างที่กระดาษและฟิล์มมาตรฐานทำไม่ได้.
วัสดุหน้าทำจากฟอยล์อลูมิเนียมเป็นตัวเลือกแบบดั้งเดิมที่หรูหรา — หนา เงาวับเหมือนกระจก และมีความพรีเมียมอย่างปฏิเสธไม่ได้ นอกจากนี้ยังเป็นตัวเลือกที่มีราคาสูงที่สุดด้วย ส่วน BOPP เคลือบโลหะเป็นทางเลือกที่สมเหตุสมผลและประหยัด: มีชั้นอลูมิเนียมบางที่เคลือบด้วยวิธีระเหยบนฐาน BOPP ซึ่งให้ผลกระทบทางภาพประมาณ 80% ด้วยต้นทุนเพียง 40–60% สำหรับแบรนด์ส่วนใหญ่ BOPP เคลือบโลหะจึงเป็นตัวเลือกที่คุ้มค่ากว่า.
ข้อควรระวังทางเทคนิคหนึ่งข้อ: วัสดุหน้าฉลากทำจากอลูมิเนียมมีคุณสมบัติเป็นตัวนำไฟฟ้า หากคุณกำลังพิจารณาใช้ฉลากอัจฉริยะ RFID หรือ NFC — ซึ่งเป็นความต้องการที่เพิ่มมากขึ้นในอุตสาหกรรมยาและสินค้าหรู — ฟอยล์แบบทึบอาจก่อให้เกิดการรบกวนต่อประสิทธิภาพของเสาอากาศ ส่วน BOPP เคลือบโลหะ ซึ่งมีชั้นโลหะที่บางกว่าและไม่ต่อเนื่องกันมากนัก จึงมีโอกาสก่อให้เกิดปัญหาน้อยกว่า.
การเลือกกาวให้เหมาะสมกับพื้นผิวและสภาพแวดล้อม: กรอบการเลือก
เมื่อได้พิจารณาวัสดุต่าง ๆ แล้ว การเลือกกาวก็กลายเป็นการจับคู่ที่เหมาะสม เริ่มจากวัสดุของภาชนะก่อน:
- แก้วและโลหะ (พลังงานผิวสูง): กาวอะคริลิกแบบถาวรมาตรฐานทำงานได้ดีในสภาพส่วนใหญ่.
- HDPE, LDPE, PP และโพลีโอเลฟินอื่น ๆ (พลังงานผิวต่ำ, 30–38 ไดน์/ซม.): คุณจำเป็นต้องใช้กาวที่มีแรงยึดเกาะสูง ซึ่งทำจากยางหรืออะคริลิกที่ปรับปรุงแล้ว กาวอะคริลิกแบบมาตรฐานจะไม่ทำงานได้.
- พื้นผิวที่เคลือบหรือผ่านกระบวนการรักษา: ตรวจสอบให้แน่ใจว่าชั้นเคลือบไม่ก่อให้เกิดชั้นกั้น บางชนิดของวานิช UV และชั้นเคลือบป้องกันไฟฟ้าสถิตอาจทำให้ความยึดติดลดลงอย่างมาก.
จากนั้นประเมินสภาพแวดล้อม:
- บรรยากาศรอบตัว, แห้ง: กาวส่วนใหญ่มีประสิทธิภาพดี เลือกตามราคาและความต้องการในการถอดออก.
- เก็บในตู้เย็น (0–4°C): ใช้อะคริลิกที่ออกแบบมาสำหรับอุณหภูมิต่ำ การเกิดน้ำค้างเป็นปัจจัยสำคัญแม้ในอุณหภูมิต่ำ — ต้องระบุความสามารถในการติดบนพื้นผิวที่เปียก.
- แช่แข็ง (-20°C หรือต่ำกว่า): ต้องใช้กาวที่เหมาะสำหรับตู้แช่แข็งเท่านั้น สูตรมาตรฐานจะสูญเสียความเหนียวทั้งหมดเมื่ออุณหภูมิต่ำกว่าอุณหภูมิการเปลี่ยนสถานะของแก้ว.
- การบรรจุร้อนหรือการฆ่าเชื้อในหม้อความดัน (40–100°C): สารยึดติดต้องทนต่ออุณหภูมิในการใช้งานได้โดยไม่ไหลออก และรักษาความยึดติดไว้ได้ตลอดกระบวนการเปลี่ยนแปลงอุณหภูมิซ้ำๆ.
- พื้นผิวที่เปียกหรือมีน้ำควบแน่น: นี่คือกรณีที่ยากที่สุด สารยึดติดแบบเปียกถูกออกแบบมาเพื่อขับความชื้นออกจากเส้นต่อ แต่ประสิทธิภาพจะแตกต่างกันไปตามสูตร ไม่มีวิธีใดที่สามารถแทนที่การทดสอบบนภาชนะที่บรรจุจริงของคุณที่ความเร็วสายการผลิตได้.
อีกอย่างหนึ่ง: ให้ทำการทดสอบบนผลิตภัณฑ์จริง ไม่ใช่ตัวอย่างที่สะอาด แห้ง และอยู่ในอุณหภูมิห้อง ซึ่งส่งมาจากผู้จัดหาฉลาก — แต่เป็นผลิตภัณฑ์จริง ที่เพิ่งออกมาจากสายการบรรจุของคุณ โดยใช้ความเร็วในการผลิตจริง ความแตกต่างระหว่างการทดสอบในห้องปฏิบัติการกับการผลิตจริงในเช้าวันจันทร์ คือจุดที่ปัญหาฉลากส่วนใหญ่เกิดขึ้น.
How Labeling Machines Apply Pressure Sensitive Labels

Knowing what a pressure sensitive label is matters. Knowing how a machine applies it matters more if you are the one responsible for keeping the line running.
A pressure sensitive labeling machine performs a deceptively simple sequence: unwind the label roll, peel each label from its liner, position it precisely on the moving product, and press it down firmly. The simplicity masks genuine engineering complexity. Here is how it breaks down step by step:
Step 1 — Unwind and tension control. The label roll feeds into the machine through a dancer arm or tension control system that maintains constant web tension. If tension fluctuates, label spacing drifts and placement accuracy degrades. This is especially important on acceleration and deceleration.
Step 2 — Peel. The label web passes over a peel plate — a sharp-edged metal blade set at an angle of 15–30 degrees. As the liner makes a tight U-turn around the peel edge, the label cannot follow because the facestock is stiffer than the liner. The label separates and hangs in position, adhesive side facing the product, ready for application. The peel plate angle is a tuning parameter: steeper angles peel more aggressively but increase the risk of label skew.
Step 3 — Application method. This is where machines diverge. Three main application styles dominate the industry:
- Wipe-on (merge): The label is pressed onto the product as it passes the peel plate. A foam roller or brush follows behind to smooth it down. This is the most common method for cylindrical containers — cans, bottles, jars — because it is mechanically simple and works well with wrap-around labels.
- Air-blow: A burst of compressed air pushes the label from the peel plate onto the product. No physical contact is needed, which makes it ideal for delicate or irregularly shaped products. The trade-off is lower placement accuracy in high-speed applications.
- Tamp-blow: The label is first held on a vacuum pad (the tamp), which extends toward the product, then a puff of air releases the label onto the surface. This hybrid approach offers the highest placement accuracy and works on recessed or uneven label panels, but adds mechanical complexity.
Step 4 — Wipe-down and bond. After placement, a series of rollers, brushes, or belts press the label firmly onto the product surface, driving the adhesive into full contact and eliminating air bubbles. In wrap-around applications on cans, the product typically rotates against a stationary wipe-down belt, which spirals the label around the circumference.
Step 5 — Sensing and control. Every label has a gap or registration mark between it and the next label on the roll. A photoelectric sensor (contrast-based for opaque labels, ultrasonic for clear labels) detects this gap and triggers the next dispense cycle. Servo-driven systems synchronize label feed speed with product conveyor speed, achieving placement accuracy within ±0.5 mm. Stepper motor systems are more economical but typically deliver ±1.5 mm — acceptable for many applications but not for small labels on tight registration panels.
For context on scale: a mid-speed labeling station on a canning line runs 60–150 containers per minute. At 150 cpm, the machine has 0.4 seconds to peel, position, apply, and wipe down each label. Every component — the liner, the adhesive, the peel geometry, the sensor response time — must work together inside that window.
Pressure Sensitive vs. Other Labeling Methods: A Side-by-Side Comparison
Pressure sensitive labels are not the only way to decorate a container. Shrink sleeves, glue-applied labels, and direct printing each have their place. The right choice depends on your container shape, production volume, visual goals, and budget. Here is how they stack up:
| มิติ | Pressure Sensitive (PSL) | ปลอกหด | Glue-Applied | พิมพ์โดยตรง |
|---|---|---|---|---|
| การสมัคร | Pressure bonds via built-in adhesive | Heat shrinks sleeve onto container | Liquid glue applied, label pressed on | Ink printed directly on container |
| Coverage | Localized (front/back or wrap) | 360° full coverage | Localized | Static, no separate label |
| Material cost | ระดับกลาง | Medium-high (~25% more) | ต่ำ | Lowest (no substrate) |
| อุปกรณ์ | ระดับกลาง | High (needs heat tunnel) | ระดับกลาง | ต่ำ |
| การเปลี่ยนระบบ | Fast (swap roll) | Slower (change mandrel) | Slowest (clean glue) | N/A (plate change) |
| เหมาะที่สุดสำหรับ | Smooth, round/flat, quick changes | Irregular shapes, full graphics | High-volume standard bottles | Long-run fixed designs |
The headline number: pressure sensitive labels account for approximately 77% of U.S. label demand. That dominance is not an accident. PSL offers the best balance of print quality, application flexibility, changeover speed, and operational cleanliness. The line does not need a glue station. It does not need a heat tunnel. It needs a roll of labels and a well-tuned applicator.
Shrink sleeves earn their place when the container shape demands it — heavily contoured bottles, hourglass profiles, full-wrap squeezable tubes. The 360-degree canvas is compelling for brands that want maximum shelf presence. But shrink sleeves require a heat tunnel, consume more material, and typically run slower to change over between SKUs. At roughly 25% higher per-label cost than PSL, the premium must be justified by the visual or functional requirement.
Glue-applied (cut-and-stack) labels dominate in high-volume commodity applications — think mass-market beer bottles and canned vegetables — where cost per label is the overriding concern. The equipment is more demanding to maintain (glue pots require regular cleaning) and changeover times are longer, but at enormous scale the material savings add up. For small-to-medium production runs and frequent SKU changes, PSL is almost always the more practical choice.
Can Labeling: Why Cylindrical Containers Demand Special Consideration
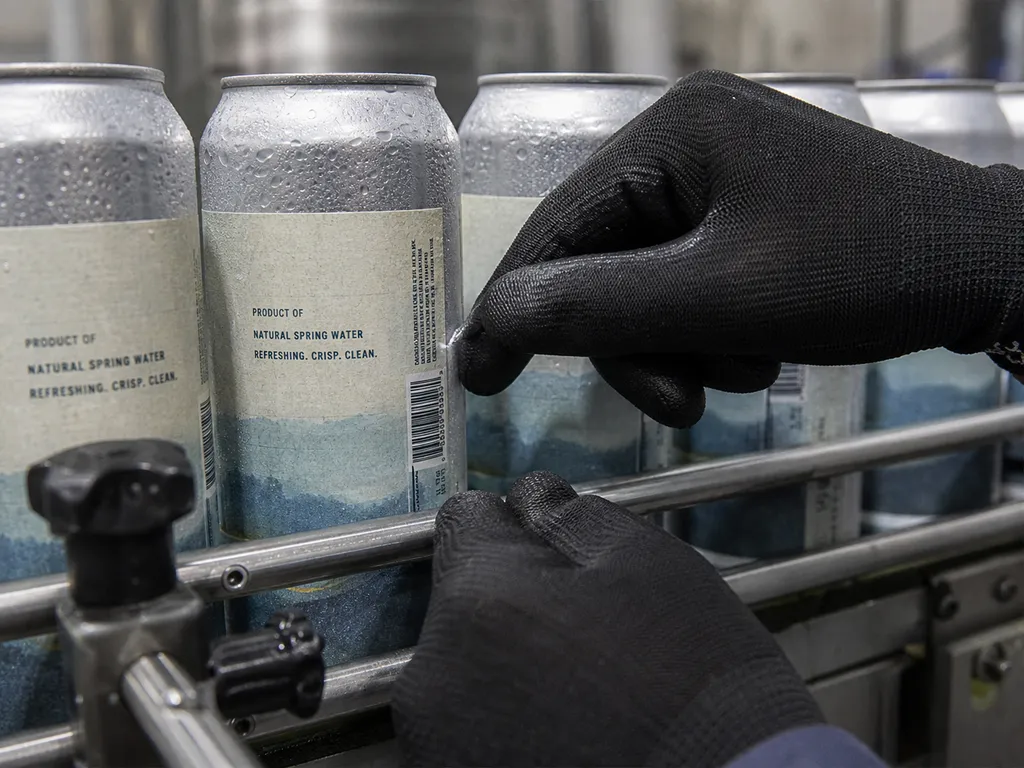
Here is where most pressure sensitive label guides fall short. They talk about “containers” in the abstract — bottles, jars, cartons — and treat them as interchangeable. But if you are labeling metal cans, you are dealing with a set of physical and environmental challenges that a standard bottle-labeling strategy does not address.
A can is not just another cylinder. It has a double seam at each end, possibly a rib or bead for structural reinforcement, and a surface that transitions from ambient to cold to wet within seconds on a filling line. Here is what that means in practice — and what to do about it.
Can Geometry: Curvature, Seams, and the Shrinking Label Panel
Look at a standard food can. The double seam at the top and bottom — the rolled crimp that seals the can end to the body — consumes 2.8–3.2 mm of vertical height at each end. That space is not available for labeling. The actual label panel — the usable flat area between the seams — is narrower than the can’s total height. Plan your label height accordingly, with at least a 2 mm safety margin from each seam edge.
Around the circumference, wrap-around labels need to be cut to a precise length. The label must be long enough to cover the full can body with a 3–5 mm overlap at the seam — the overlap is where the label adheres to itself rather than the can, and this self-adhesive bond is what prevents flagging at the label edge. Cut too short and the edges lift. Cut too long and the overlap creates a visible double-thickness ridge.
Can diameters follow industry-standard numbering systems — the 202–603 range in North American can manufacturing, spanning roughly 52 mm to 153 mm. If your labeling machine cannot accommodate your full can diameter range, every SKU change means swapping mandrels or guides.
Surface and Environmental Factors: Cold, Wet, and Moving Fast
The filling line environment creates conditions that no label specification sheet fully anticipates. After cold-filling — common in craft beer, cold-brew coffee, and certain dairy-based nutritional products — the can surface temperature drops to 2–5°C and condensation forms almost immediately. That water film sits between the adhesive and the metal, cutting initial tack by 40–60%. A standard room-temperature adhesive will not grab reliably in these conditions.
At the opposite thermal extreme, hot-filled products emerge from the retort or pasteurizer at 40–60°C. The adhesive must be stable enough not to ooze during application yet remain flexible as the can cools and the metal contracts. Thermal cycling — from retort heat to ambient storage — puts more stress on label adhesion than most manufacturers realize until a pallet of flagged labels comes back from a customer.
Can surface finish introduces another variable. Some tinplate cans carry a thin film of anti-corrosion oil from the manufacturing process. That oil is invisible but it reduces surface energy enough to compromise adhesion. A wipedown or flame-treatment station upstream of the labeler eliminates this risk, but it is a step many smaller lines skip — until a labeling failure forces the issue.
On a line running 100 cans per minute, the label application window for each can is roughly 0.6 seconds. The surface condition of the can in that exact 0.6-second window determines whether the label bonds correctly. There is no second chance on the next rotation.
Choosing a Labeling Machine for Can Production Lines
After understanding the material and environmental challenges, the equipment decision follows naturally. What should you look for in a can labeling machine?
First, placement accuracy. Servo-driven labelers capable of ±0.5 mm repeatability are the industry standard for quality-conscious operations. Stepper-driven systems at ±1.5 mm are workable for larger labels with generous registration tolerance, but tight label panels or multi-panel designs demand servo control.
ประการที่สอง, diameter range and changeover speed. A labeling machine that handles can diameters from 50 mm to 180 mm covers the vast majority of commercial can formats. Quick-change systems with tool-free diameter adjustment can reduce changeover from 30–60 minutes to 5–10 minutes — a significant factor for co-packers and multi-SKU lines.
ประการที่สาม, wet-environment compatibility. If your line involves cold-fill, post-pasteurization condensation, or washdown cleaning, the labeling machine’s frame, sensors, and electronics must be rated for moisture exposure. Stainless steel construction and IP65-rated enclosures are minimum specifications worth insisting on.
Fourth, integration readiness. The labeler needs to communicate with upstream and downstream equipment — receiving speed signals from the filler, sending fault signals to the line controller, and synchronizing with the coding station that follows. Look for standard industrial communication protocols (EtherNet/IP, Profinet, or Modbus TCP) rather than proprietary systems that lock you into one vendor.
One honest piece of advice from the packaging community: buying the cheapest labeling machine is a reliable way to spend more money. As one production manager put it on an industry forum, “One from Vevor never affixes properly.” Entry-level machines often lack the sensor quality, frame rigidity, and web-path precision to maintain consistent placement at production speed. The savings disappear into downtime, missed labels, and rejected product within weeks of installation. For operations serious about uptime, working with a manufacturer that specializes in packaging-line integration is worth the conversation early in the specification process. Levapack, for example, offers can labeling machines configured to your production requirements with servo-driven placement, multi-diameter compatibility across the 50–180 mm range, and the ability to integrate the labeling station into a complete filling-and-seaming line — an approach that eliminates the finger-pointing between separate equipment vendors when something does not synchronize. For teams with unique container dimensions or specialized line layouts, custom packaging machinery solutions can be engineered to the specific can format and throughput target rather than adapting a standard machine to a non-standard application.
Integrating Labeling Into a Complete Packaging Line
A pressure sensitive labeler does not operate in isolation. On a real production floor, the labeling station sits between the seamer and the coder, drawing its pacing from the filler upstream and handing off to the case packer downstream. Understanding those dependencies is what separates a smooth commissioning from a month of troubleshooting.
A typical canning line flows in this order: depalletizer → rinser → filler → seamer → labeler → coder → case packer → palletizer. The labeler’s speed rating must match or exceed the filler’s output. A filler running 120 cpm connected to a labeler rated for 80 cpm creates a bottleneck that caps the entire line’s throughput. The line runs at the speed of its slowest station.
Three practical integration considerations:
- Speed synchronization. The labeler’s conveyor must track the speed of the main line conveyor precisely. Any drift between the two causes the label to land early or late relative to the can — and at 120 cpm, a 50-millisecond timing error produces a 6 mm placement shift.
- Buffer zones. Leave at least 1.5 meters of conveyor between the seamer and the labeler, and another 1.5 meters between the labeler and the coder. These buffer zones absorb the natural ebb and flow of can spacing and prevent a momentary jam at one station from cascading into the next.
- Control system integration. A single PLC governing the entire line is ideal — it lets the labeler respond to stop/start signals from any upstream or downstream station. Without integrated controls, a jam at the coder is invisible to the labeler, which keeps dispensing labels onto cans that are piling up.
For operations building or upgrading a complete line, sourcing the labeling station from the same integrator that supplies the filling and seaming equipment eliminates finger-pointing when something does not synchronize. Single-source line integration also simplifies after-sales support — one contact, one warranty, one set of spare parts logistics. The alternative — buying the cheapest available machine for each station and stitching them together yourself — can work, but the integration risk lands entirely on your team.
How to Choose the Right Pressure Sensitive Label: A Practical Checklist
The difference between a label that looks great in a mockup and a label that runs 150 cpm shift after shift without a single flag is not luck. It is the result of working through every layer — facestock, adhesive, liner, machine — as an interconnected system rather than a shopping list of separate decisions.
แหล่งอ้างอิง
- ASTM International. “ASTM D5375/D5375M-98(2023) — Standard Test Methods for Liner Removal at High Speeds from Pressure-Sensitive Label Stock.” 2023. https://www.astm.org/d5375-d5375m-98r23.html
- Quadrel Labeling Systems. “What Are Pressure Sensitive Labels? How They Work, Materials, Adhesives, and Applications.” April 2026. https://www.quadrel.com/what-are-pressure-sensitive-labels/
- Resource Label Group. “Pressure Sensitive Label Advantages and Applications.” October 2022. https://www.resourcelabel.com/blog/2022/10/31/advantages-disadvantages-pressure-sensitive-labels/
- CTM Labeling Systems. “Pressure Sensitive Labels vs. Self-Adhesive Labels — Is There a Difference?” https://ctmlabelingsystems.com/pressure-sensitive-labels-vs-self-adhesive-labels-is-there-a-difference/
- Weber Packaging Solutions. “What Is a Pressure-Sensitive Label?” April 2022. https://info.weberpackaging.com/blog/what-is-a-pressure-sensitive-label
- Future Market Insights. “Pressure Sensitive Tapes and Labels Market Outlook.” 2026. https://www.futuremarketinsights.com/reports/pressure-sensitive-tapes-and-labels-market
- CCL Healthcare. “The Best Guide to Pressure Sensitive Labels.” https://cclhealthcare.com/blog/pressure-sensitive-labels-guide/
- Levapack. “Can Labeling Machines.” https://www.levapack.com/can-labeling-machines/
- Levapack. “Custom Packaging Machinery Solutions.” https://www.levapack.com/customization/
- Levapack. “Contact.” https://www.levapack.com/contact/
- Levapack. Homepage. https://www.levapack.com/


 EN
EN  RU
RU  ES
ES  FR
FR  DE
DE  NL
NL  IT
IT  JA
JA  ID
ID  PT
PT  KO
KO  AR
AR  TH
TH  VI
VI  TR
TR  PL
PL